// =======================================================Selects the background layer and makes a copy. Note that the initial layer you begin with MUST be called background and be locked.
var image = app.activeDocument;
var background = app.activeDocument.artLayers.getByName("Background");
background.duplicate();
background.visible = false;
var copy = image.artLayers.getByName("Background copy");
// =======================================================Makes 2 new layers and names them.
var newLayer = image.artLayers.add();
var Layer1 = image.artLayers.getByName("Layer 1");
var Layer2 = image.artLayers.getByName("Layer 2");
// =======================================================Makes the active layer the copied layer.
image.activeLayer = copy;
// =======================================================Goes into the channels and copies the red channel to a new layer.
var redChannel = image.channels.getByName("Red");
var arrayRed = new Array (redChannel);
image.activeChannels = arrayRed;
image.selection.selectAll();
image.selection.copy();
image.activeLayer = Layer1;
image.paste();
// =======================================================Does the same for the green but also makes it a screen layer and changes the opacity to 50%.
var greenChannel = image.channels.getByName("Green");
var arrayGreen = new Array (greenChannel);
image.activeChannels = arrayGreen;
image.selection.selectAll();
image.selection.copy();
image.activeLayer = Layer2;
image.paste();
image.activeLayer.blendMode = BlendMode.SCREEN;
Layer2.opacity = 50;
// =======================================================Makes the original image visible again then copies it's newly made green/red channel layers and goes into the channel box and pastes them in as the new red channel and green channel.
copy.visible = false;
image.mergeVisibleLayers();
image.selection.selectAll();
image.selection.copy();
copy.visible = true;
image.activeLayer = copy;
var redChannel = image.channels.getByName("Red");
var arrayRed = new Array (redChannel);
image.activeChannels = arrayRed;
image.paste();
var greenChannel = image.channels.getByName("Green");
var arrayGreen = new Array (greenChannel);
image.activeChannels = arrayGreen;
image.paste();
// =======================================================Makes the merged layer invisible then flattens the visible image.
image.activeLayer = Layer2;
Layer2.visible = false;
image.flatten();
image.selection.deselect();
Thursday, March 31, 2011
Closer but can't figure out how to select the RGB Channel on it's own.
// =======================================================
var image = app.activeDocument;
var background = app.activeDocument.artLayers.getByName("Background");
background.duplicate();
background.visible = false;
var copy = image.artLayers.getByName("Background copy");
var newLayer = image.artLayers.add();
var Layer1 = image.artLayers.getByName("Layer 1");
var Layer2 = image.artLayers.getByName("Layer 2");
image.activeLayer = copy;
var redChannel = image.channels.getByName("Red");
var arrayRed = new Array (redChannel);
image.activeChannels = arrayRed;
image.selection.selectAll();
image.selection.copy();
image.activeLayer = Layer1;
image.paste();
var greenChannel = image.channels.getByName("Green");
var arrayGreen = new Array (greenChannel);
image.activeChannels = arrayGreen;
image.selection.selectAll();
image.selection.copy();
image.activeLayer = Layer2;
image.paste();
image.activeLayer.blendMode = BlendMode.SCREEN;
Layer2.opacity = 50;
copy.visible = false;
image.mergeVisibleLayers();
image.selection.selectAll();
image.selection.copy();
copy.visible = true;
image.activeLayer = copy;
var redChannel = image.channels.getByName("Red");
var arrayRed = new Array (redChannel);
image.activeChannels = arrayRed;
image.paste();
var greenChannel = image.channels.getByName("Green");
var arrayGreen = new Array (greenChannel);
image.activeChannels = arrayGreen;
image.paste();
var RGBChannel = image.channels.getByName("RGB");
image.activeChannels = arrayRGB;
Color Blind Code WIP
// =======================================================
var image = app.activeDocument;
app.activeDocument.artLayers.getByName("Background");
var newLayer = image.artLayers.add();
var Layer1 = image.artLayers.getByName("Layer 1");
var Layer2 = image.artLayers.getByName("Layer 2");
var redChannel = image.channels.getByName("Red");
var arrayRed = new Array (redChannel);
image.activeChannels = arrayRed;
image.selection.selectAll();
I wanted to unlock the background layer but none of the help seemed to be working. I was given this code to use but I think because I use PhotoshopCS it wasn't working properly.
if(hasBackground()){
activeDocument.activeLayer = activeDocument.artLayers.getByName("Background");
activeDocument.activeLayer.isBackgroundLayer = false;
}
function hasBackground() {
var ref = new ActionReference();
ref.putProperty(charIDToTypeID("Prpr"), charIDToTypeID("Bckg"));
ref.putEnumerated(charIDToTypeID("Lyr "),charIDToTypeID("Ordn"),charIDToTypeID("Back"));
var desc = executeActionGet(ref);
var res = desc.getBoolean(charIDToTypeID("Bckg"));
return res;
};
Tuesday, March 29, 2011
First Simple Script
// if image is in portrait mode, rotate it 90 degrees
if (activeDocument.height > activeDocument.width) {
activeDocument.rotateCanvas(90);
}
It's super simple and somewhat not really important. But it does something. Yay me. Just from scanning a few tutorials I learned the generic // means comments and activeDocument is required syntax and the whole () vs {} business which I guess is stuff we've already gone over. I don't really know how else to explain this but I read up on the terms here.
http://www.earthboundlight.com/phototips/your-first-photoshop-script.html
Monday, March 28, 2011
Photoshop Perspective
I thought this video was not "useful" per say but I thought it was interesting and the most beneficial to me when it comes to using photoshop. I rarely use photoshop. The only times I use it are if I want to use the noise filter or a specific symmetrical brush like a perfect star or circle. I don't believe I would use actionscript/javascript more often than for small things like this because so far, I haven't run into a situation where I'd need to do something a lot repeatedly. I'm saying that now because I haven't run into it SO FAR. But photoshop is not a painting system that I use for my drawings. Frankly, I think it's absolutely terrible for drawing and the ink brushes are disgusting. I avoid it as much as possible and stick to the better art programs.
Sunday, March 27, 2011
Sleepy Stars
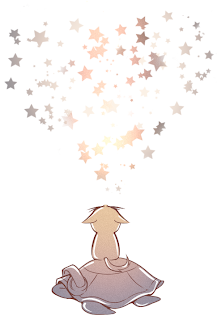
Messing with Photoshop brushes and gradients. Basically I wanted to go for a more child-like picture and this was also a sort of inside joke. But overall this is a kitten and a turtle looking up at the stars. The idea was to follow another picture using only sunset like gradients. I also used the noise filter a few times. Not entirely sure why but the noise filter always seems to give the picture some textures.
Wednesday, March 23, 2011
Chibis
I wanted to try a new style of chibis. Chibis in anime is basically a small deformed version of the original which usually follows the rule of having a small body with a rather large head. It's mostly aimed to be cute and cuddly type deal. Below was a style with lots of detail that I was trying. It involved more shading and more pattern detail on the clothings. Above was a new style I was trying. Before when I drew chibis there always seemed to be something off with the eyes that I was never satisfied with. However, an artist that I came upon completely blacked out the eyes. Granted it gives it a more demonic look but in some cases like the 2 on the right, it gave off a more doll like appeal. I'm still not sure which style I'm going to stick with. There's always a different way of drawing them.
Sunday, March 20, 2011
Aqua
A drawing I did focusing around on Black and White and shades of Blue. I wanted to work with limited color as well as perspective. The purple and yellow are part of her official art so I had to include them. I like that they were including to bring focus up towards the face.
Sunday, March 13, 2011
Assignment 3 #5 Forbidden/Impossible Colors
So I've never actually heard of these so called forbidden colors. And especially these phrases when I looked it up. I've asked all of my artist friends online and offline and they've never heard about them before either. So from this I actually wanted to roll my eyes and call this stuff that doesn't apply to me because with traditional media, I'm happy making whatever colors I want.
But instead I recalled a thing with binocular vision that could somewhat allowed you to see a reddish green or a bluish yellow. The idea I don't recall was definitely one or the other.
Was either
1) Stare at one dot for about 20/30 seconds in one square and then move to stare at the dot in the other square and the colors around the edges of the boxes could sorta turn into the forbidden colors.
Note: I tried this with the red to green and saw little redish tints at the end. Following that was tears out of my eyes from staring for so long. (ps, i'm not joking about the tears so warning if you attempt this)
2) Stare at both the dots and then if you cross your eyes it can merge the boxes and you can somehow see the forbidden colors. (I wasn't able to pull this off but I do remember some little eye test like this was in a magazine or something.)
I also wasn't sure if the merging of colors with your eyes played with white and black. From what I remember there was always a black dot in the center. (That's the one that worked for me for #1) and so I made red green yellow blue with reverse black and white dots. Attempt this at your own risk. Forbidden colors hurt.
Tuesday, March 8, 2011
Flat Colors
After you ink your picture from last time, the next step is to basically lay down all the base colors. Which are the colors that you will be working with when placing shadows and highlights. If you've used photoshop then Paint Tool SAI's layers are going to be easy to understand. Inks are done on a layer ON TOP of any colors you put down. You might want to either separate the layers via character like I did or by color. But I find that it gets a little confusing if you do it that way because you have to remember and skim through all the color layers in case you missed something. This is also a somewhat tedious thing to do but setting all the colors can help you with your overall color scheme.
For this piece, it basically took me 3 days to complete the base colors. I enjoy putting down the overall color scheme (even though it can sometimes be rather frustrating). Shading it going to be a whole different story. But I guess I'll attempt to do a little tutorial on one of them.
Assignment 3 #3 Linear
*Note: This code does not produce them all, I just lined them up to look nice.
select -all; doDelete;
string $name;
string $name2;
//Attempted int $red,$green,$blue but it wasn't working so stuck with float
float $red;
float $green;
float $blue;
//Wanted these to drape since I made a sort of keyboard last time.
for ($y=-20;$y<20.0;$y++)
{
$red = 0.0;
$green = 0.0;
$blue = 0.0;
//Got help that positive and negative variables could adjust the colors.
$red -= ($y*0.05);
$green += ($y*0.05);
$blue -= ($y*0.05);
//The rest of the code basically follows the assigned shaders from the previous assignments.
$name = `shadingNode -asShader blinn`;
$name2 = $name + ".color";
setAttr $name2 -type double3 ($red) ($green) ($blue);
polyCube -w .03 -h .03 -d 0.5 -sx 1 -sy 1 -sz 1 -ax 0 1 0 -cuv 4 -ch 1;
xform -translation 0 (0.05*$y) 0;
hyperShade -assign $name;
}
;
Had lots of problems with this. Always saw the default red color and black. I wasn't able to get it to go through white or gray, just solid black.
Thursday, March 3, 2011
Assignment 3 # 4 : NonLinear
I was originally going to continue using the spheres but for some reason when I thought of the polygon cubes it made me think they'd be presenting sort of like a piano keyboard. If I could get it to reproduce black keys above it that'd be pretty cool too. I worked off the Color Wheel code from before.
select -all;
select -all;
doDelete;
float $radius = 60.0;
float $rotation = 360.0/60.0;
//float $translate = 1.0/10.0;
string $name;
string $name2;
for ($x=0;$x<20.0;$x++)
{
for ($y=0;$y<20;$y++)
{
$angle = $x * $rotation;
// $saturation = $y * $translate;
$hue = $angle/360.0;
$name = `shadingNode -asShader blinn`;
$name2 = $name + ".color";
vector $wheel = hsv_to_rgb(<<$hue, 1, 1>>);
setAttr $name2 -type double3 ($wheel.x) ($wheel.y) ($wheel.z);
polyCube -w .03 -h .03 -d 0.5 -sx 1 -sy 1 -sz 1 -ax 0 1 0 -cuv 4 -ch 1;
xform -translation (0.05*$x) 0 0;
// rotate -pivot 1 0 1 0 $angle 0;
hyperShade -assign $name;
}
}
Tuesday, March 1, 2011
Assignment 3 # 2 Color Wheel
So above I have the color wheel that I want to present as my final assignment. I originally wanted to try for a spiral thing but all the numbers were getting to annoying for me to figure out how to rotate them properly. But I made this and I really like how the colors are interwoven with each other. The colors also seem more vibrant in this version. I also have the proper color wheel but I want to submit this one instead. Unless I have to show the proper color wheel that'll come up later. I still like the top one alot better.
OH and I also figured out why I kept only getting red on those other circles. On this area here:
$angle = $x * $rotation;
$saturation = $y * $translate;
$hue = $angle/360.0;
I had angle as "rotation" instead. I can't exactly explain why it was only giving me red and white but that's probably my fault for naming rotation and angle...preeeeeeetty much the same thing in my head.
For this project I'm actually really glad we did the color cube. Most of the coding I got to actually put the colors on there, were from the color cube assignment when they were assigning shaders and whatnot. Then Kniss going over the hsv_to_rgb in class and set up the variables was extremely helpful.
select -all;
doDelete;
float $radius = 60.0;
float $rotation = 360.0/60.0;
float $translate = 1.0/10.0;
string $name;
string $name2;
for ($x=0;$x<60.0;$x++)
{
for ($y=0;$y<20;$y++)
{
$angle = $x * $rotation;
$saturation = $y * $translate;
$hue = $angle/360.0;
//Assigning the shaders. Similar to the color cube assignment, just using Blinn again.
$name = `shadingNode -asShader blinn`;
$name2 = $name + ".color";
//Changing HSV to RGB
vector $wheel = hsv_to_rgb(<<$hue, $saturation, 1>>);
//Setting the shaders to pick around the colors...ok mostly this was just copied from the Color cube but it looks like it works.
setAttr $name2 -type double3 ($wheel.x) ($wheel.y) ($wheel.z);
//Making the spheres.
polySphere -ch on -o on -r .03;
//Moving them to form a circle.
xform -translation $saturation 0 0;
//I messed around alot with the circle here. How it shapes etc. This makes it into the woven color circle.
rotate -pivot 1 0 1 0 $angle 0;
//Assign them their shades similar to the color cube.
hyperShade -assign $name;
}
}
;
Artist color wheel WIP.
Subscribe to:
Posts (Atom)